Light, Location & Composition:
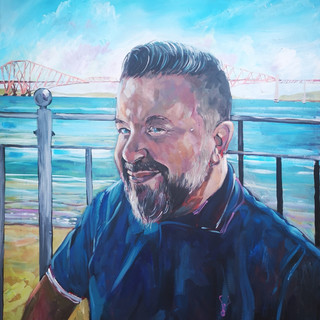
The Foundations of Great Photography
Great photography isn't always about having the most expensive camera, the biggest lens or the latest technology. Often, the difference between an ordinary photograph and a memorable one comes down to three simple things: light, location and composition.
Learning to recognise these elements before you press the shutter can transform the way you approach photography. Instead of simply pointing your camera at a subject, you begin to see the possibilities within the scene.
Understanding Light
Light is the raw material of photography. It influences the mood, texture, colour, contrast and emotion of an image.
Before taking a photograph, don't just look at your subject. Look at the light falling on it.
Natural and Artificial Light
There are two broad types of light you will encounter.
Natural light comes from sources such as the sun, daylight and windows. It changes throughout the day and can vary dramatically depending on the weather and time of day.
Artificial light comes from sources such as lamps, street lighting, signs and studio lights. Because it can often be controlled more easily, it gives photographers different opportunities to shape and direct their images.
Direction of Light
Where the light comes from can completely change the appearance of your photograph.
Front lighting illuminates the subject evenly and can produce a relatively flat image with fewer dramatic shadows.
Side lighting creates shadows across the subject, revealing texture, shape and form. It can be particularly effective for portraits, architecture and detailed subjects.
Backlighting occurs when the main light source is behind your subject. This can create silhouettes, glowing edges, atmospheric effects and dramatic backgrounds.
Sometimes simply moving around your subject by a few metres can completely transform the photograph.
Hard Light and Soft Light
The quality of light is just as important as its direction.
Hard light produces strong shadows and high contrast. Bright midday sunshine is a common example. It can create bold, dramatic images but can also produce harsh shadows.
Soft light produces gentler shadows and more gradual transitions between light and dark. Overcast weather, window light and the golden hours around sunrise and sunset can provide softer, more flattering conditions.
Neither is necessarily better. The important thing is understanding what each type of light can contribute to your photograph.
Colour Temperature
Light also has a colour.
Warm light, such as the golden tones found around sunrise and sunset, can create photographs that feel warm, emotional and cinematic.
Cooler light, often associated with shade or overcast conditions, can create a calmer, moodier or more atmospheric feeling.
Understanding colour temperature allows you to use the natural mood of the light rather than simply trying to correct it.
A useful habit is to stop looking only at your subject and start looking at the light.
Exploiting Your Location
A good photograph isn't just about the subject. The environment surrounding it can add context, atmosphere and story.
Before taking a photograph, take a moment to explore the location.
Look at what is behind your subject, what is in front of it and what might be used to create depth or interest.
Look at Your Background
A cluttered background can distract attention from your subject.
Look for backgrounds that are:
Clean and simple
Textured and interesting
Relevant to the story
Contrasting with your subject
Useful for creating depth
Sometimes moving just a few steps can remove a distracting object from the background and dramatically improve the photograph.
Look for Leading Lines
Leading lines are one of the easiest ways to guide your viewer through an image.
They can be created by:
Roads
Paths
Fences
Railings
Rivers
Buildings
Shadows
Architectural features
Lines can be straight, curved or diagonal. Used effectively, they can lead the eye towards your main subject and create a stronger sense of depth.
Natural Frames
Look for objects within the environment that can act as a frame around your subject.
Doorways, windows, arches, branches and even people can create natural frames.
This technique can help isolate your subject while also adding another layer of context to the photograph.
Think in Layers
A photograph can feel much more three-dimensional when it contains several layers.
Think about:
Foreground – something close to the camera.
Middle ground – your main subject.
Background – the environment surrounding the subject.
These layers can make an image feel more immersive and give the viewer a sense of being inside the scene.
Change Your Position
Don't always take the photograph from the first position you find.
Try moving:
Higher
Lower
Closer
Further away
To the side
Behind the subject
You can also move the subject if you're working with a willing model or controlled scene.
Walk the location before taking your photograph. The best composition may not be immediately obvious.
Composition: Arranging the Photograph
Composition is the way you arrange the elements within your frame.
Good composition helps guide the viewer's eye and gives the photograph structure.
You don't need to use every compositional technique in every photograph. Instead, learn the principles and recognise when they might help.

The Rule of Thirds
Imagine your photograph divided into a grid of nine sections using two horizontal and two vertical lines.
Placing important elements along these lines or at their intersections can create a balanced and natural-looking composition.
It can be particularly useful for landscapes and portraits.
However, don't feel that your subject must always be positioned away from the centre. Sometimes centre composition is exactly what the photograph needs.
Leading Lines
Leading lines can also be used as a compositional device.
A road disappearing into the distance, a railway track, a river or a row of buildings can all guide the viewer's eye through the photograph.
Diagonal and curved lines can be particularly effective because they introduce movement and a sense of journey.
Framing
Framing uses something within the scene to surround or highlight your subject.
A doorway, window, archway or overhanging branches can create a frame around your subject.
This can help reduce distractions while adding depth and context.
Negative Space
Not every part of a photograph needs to be filled.
Negative space is the empty or uncluttered area surrounding your subject.
Using plenty of negative space can make the main subject stand out and create a calm, minimalist feel.
It can be particularly effective in portrait, street and conceptual photography.
Symmetry and Patterns
Humans are naturally drawn to repetition and symmetry.
Architecture, reflections, staircases, windows and rows of objects can all create strong patterns.
Centre framing often works particularly well with symmetrical subjects.
You can also deliberately break a pattern by introducing one contrasting element. This can immediately attract the viewer's attention.
Balance
Balance is about distributing visual weight throughout your photograph.
A large object on one side of the frame might be balanced by several smaller elements on the other.
Balance doesn't necessarily mean symmetry. An image can be asymmetrical while still feeling completely balanced.
Don't Be Afraid of Unusual Angles
One of the simplest ways to make your photography more interesting is to change your viewpoint.
Instead of photographing everything from eye level, experiment with extreme angles.
Shoot Low
A low viewpoint can make a subject appear:
Larger
More powerful
Dramatic
Heroic
It can be particularly effective when photographing people, buildings, vehicles and landscapes.

Shoot High
A high viewpoint can make your subject appear smaller or more vulnerable.
It can also create interesting graphic shapes and patterns that might not be visible from normal eye level.
The important thing is that changing your viewpoint can change the meaning and feeling of the photograph.

Experiment with a Dutch Angle
Tilting the camera so that the horizon is no longer level is known as a Dutch Angle, or Dutch Tilt.
It can introduce:
Movement
Tension
Energy
Unease
Chaos
The technique is often associated with film, music photography and street photography.
The key is to use it deliberately.
A slight accidental tilt can simply look like a mistake, whereas a strong and obvious angle immediately tells the viewer that the photographer made a conscious creative decision.
If you're going to tilt the horizon, make the tilt intentional.

Bringing Everything Together
Light, location and composition shouldn't be thought about as three completely separate subjects.
They work together.
Before pressing the shutter, ask yourself:
Where is the light coming from?
Is it hard or soft? Warm or cool? Is it illuminating your subject or creating interesting shadows?
What does the location add to the photograph?
Does the background provide context? Are there leading lines, reflections, patterns or natural frames that you can use?
How does the composition guide the eye?
Where is the main subject? Is the image balanced? Could you improve it by changing your viewpoint?
These simple questions can encourage you to slow down and see the photograph before you take it.
Try This Yourself
Choose a location and photograph it several different ways.
Take one photograph concentrating primarily on the light.
Take another concentrating on composition.
Then create a third photograph where you deliberately combine the light, location and composition.
Compare the three images.
You may find that the strongest photograph isn't necessarily the one with the most interesting subject. It may simply be the one where all the elements work together.
The Camera Doesn't Make the Photograph
Modern cameras are incredibly capable, but technology can only take you so far.
The camera records what you point it at. You decide where to stand, what to include, what to leave out, when to press the shutter and how you want the final photograph to feel.
Learn the rules, experiment with them and don't be afraid to break them.
Most importantly, slow down, look around and start seeing the possibilities before you even raise the camera.
The camera doesn't make the photograph — you do.


Comments